Wednesday, June 25, 2014

Deforestation project

I don't know if I mentioned this before, but our house came with several large trees.  One of the trees in the backyard we have nicknamed the whomping willow because every time it’s windy (which is all winter in Canada) we can see it twisting and thumping the neighbor’s garage.  We lived through the whole winter wondering if the trees would stay up and not come crashing through our house or the neighbor’s garage.

I had to use Google street view to get this 2012 picture of the Whomping Honey Locust... apparently by 2014 the branches extended far enough to reach our neighbors blue garage!

Another Google street view of the large Blue Spruce to the right of the silver car and you can clearly see the bushy Juniper encroaching over the second garage door, by 2014, we couldn't use that garage entrance before hacking off several of the Junipers branches.

Here is a Google street view of the side of the house.. isn't that crazy?  You can't even tell there is a house!!

As soon as the snow cleared we made a date with a tree company that we’d spoken with as soon as we moved in.  We picked that company because the guy who came to give us the estimate told us the estimate in the fall would be higher than if we got them back in the spring.  So we choose him because he was helpful and seemed honest.  So April 25th we had his company (Ottawa Tree Surgeons) come and take down a very large blue spruce, a big dead Ash, a very big Honey Locust (aka Whomping Willow) and a medium sized Juniper in front of the garage.
This was taken early in the morning on April 25th, 2014 so the trees aren't that fluffy like in the google pics above.

Another early morning pic, but you can see the Ash tree's naked limbs.

For some reason I didn't take a picture of the juniper that is touching the side of the garage before they cut it down, but in this picture you can kind of see that it was looming over that side of the house.

They had to use an aerial lift to get the top limbs off and take the trees down in sections.  They cleaned up all the branches with a wood chipper and they used an impressively big stump grinder to clear the last evidence of a tree away from the yard.  It took them the better part of the day just to get those 4 trees out, but man are we happy we had them removed!  Several of our neighbors were quite happy as well because as soon as the Whomping Honey Locust was cut our neighbor of the blue garage doors came over and thanked us profusely for removing that tree!  LOL

Juniper on the side GONE, Blue Spruce and Ash on the front lawn GONE!  We can actually see the house now!  Woohoo!  You can also see my car's ass end peeking out of the garage :)

There is still another ugly spruce and it's ugly baby on the front lawn, but we figure if we trim up the bottom they will look better *fingers crossed*

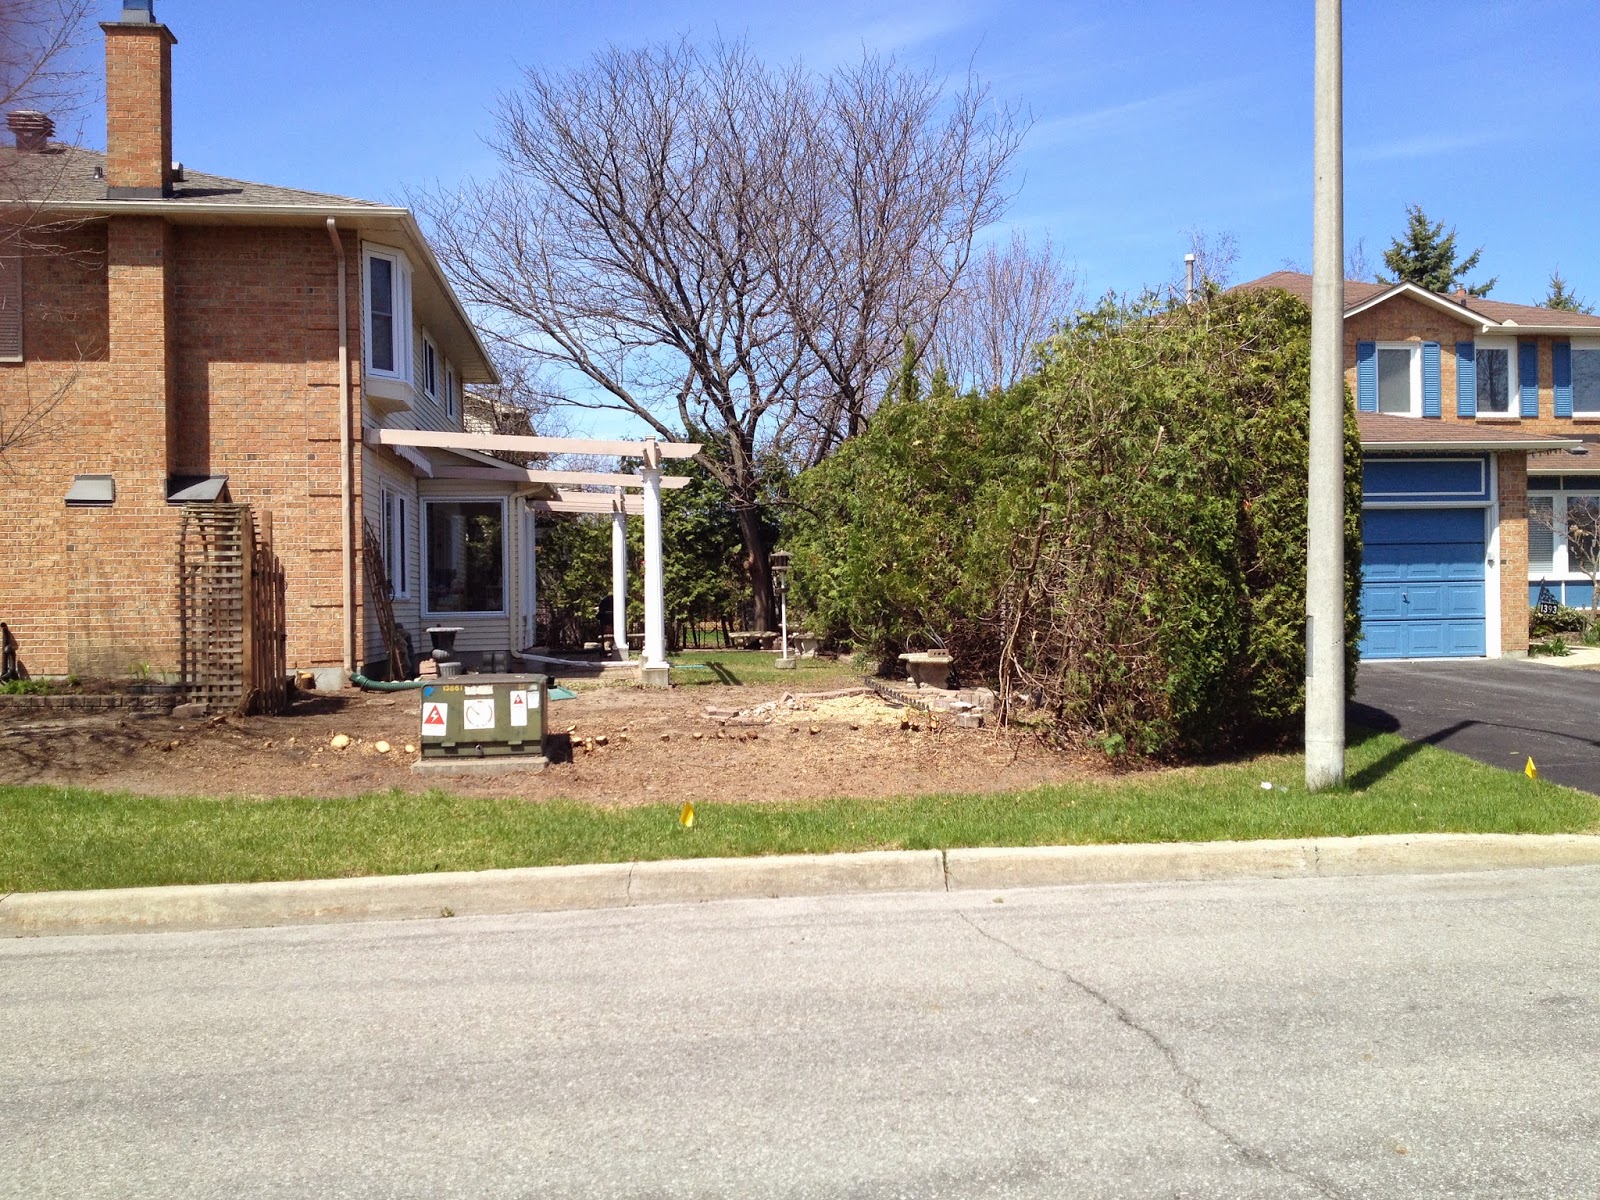
Here you can see that the whomping Honey Locust is gone as well as a whole big section of hedges.  There was a Hydro box totally engulfed by the hedges and we had to rescue it before Hydro came and hit us with a big bill for the removal.  John and I removed the remainder of  the hedge after the Tree guys cut out a 5 foot section to get to the whomping tree.

The trees had to go and we are happy they are gone.  Now we need to save up the money to get rid of the the other big Honey Locust in the backyard.   Also there are some out of control hedges growing up to almost 30 feet tall between us and our neighbors that we want to take down.  We talked to them already and they look forward to getting sun in their backyard LOL!

If you click on the picture you can see my clever use of arrows to indicate more tree stuffs that need removal.  You can also see a large pile of branches on the front lawn after John and I removed the hedges on the side of the house.

Here is my handiwork of trimming the bottom of the ugly spruce to try and make it look better :S


We hired a company to try and salvage the hedges that are not 30 feet tall.  Here is a picture of the back hedges before and after Stu from Capital City Hedges came and gave us a good trim!

Here is the side of the garage before and after.... you can spy the 30 foot monsters at the back of the after picture.  Stu said that those were no longer considered hedges but full blown trees!  LOL

Every time we are outside doing yard work, or just coming in from picking up the mail; we still stop, gaze around and marvel at how much we like the changes we've made.  We are thrilled that the neighbors are happy too!

Glitter Floor

The glitter floor project has been ongoing at least since Christmas 2013.  The logic was that I was going to rip out the carpets of every bedroom upstairs and just paint the sub floor (or chip board, pressboard whatever you want to call it) until we could afford to put in something nicer.  So, I figured why not have some fun in the craft/room office and put some glitter on top of the paint and seal it… can’t be that hard right?  Well after some googling and seeing what others did on their garage floors with paint and a good epoxy sealer, I was aching for a glitter floor!

This was the video that inspired me:  https://www.youtube.com/watch?v=wOWLFhTXRQ4
The issue was that she was using products made for a concrete floor... on a concrete floor.  I didn't have a concrete floor, and I didn't find anyone crazy enough to try and pretty up a chip board floor... No biggie right? :P
Carpet BEGONE!

So I made a  trip to the paint department of my local Homedepot store to talk to the paint guy.  I almost abandoned the project because he was telling me that garage floor paint is way way way smelly and it’s not made for wood.  So he suggested using flexible caulking to fill all the seams, gouges and nail holes left by contractors that knew they would be covered by carpet.  Then cover the whole floor in porch paint and while the paint was wet sprinkle on the glitter and let dry.
All the dust sucked up, staples removed, holes patched with caulk, baseboards taped up.

Well, the idea was great in theory, but a few problems came up.  First problem was that I decided on a white floor and bought white, opalescent and silver glitter at the craft store.  I mixed all the glitter in a big salad bowl in preparation to spread it out like grass seeds.  Painted the floor white (2 coats) and on the last coat while the paint was still wet I started to toss the glitter like I was Tinkerbelle at a Disney party.

Second coat of paint going on
Big salad bowl full O glitter :D  This picture always make me grin like an idiot LOL

Then OMG, I ran out of glitter halfway through the room … what the hell??  Did you see the size of the salad bowl... it was full!!!!  Jump in the car and race off to the craft store to buy several more containers of glitter… race back and toss the glitter over the last half of the room hoping that the label was right and that there was really a half hour of drying time.

The next morning I gingerly touched the floor to see if the glitter had stuck to the paint and it did not!!  *sigh* I checked further into the room and not much of it had stuck in the first half of the room either.  I debated on what to do and decided to just sweep up the glitter, dump it back into the big bowl and see what actually stuck.  Not much of it stuck at all and to add insult to bad planning the contrast between the pristine white floor and the silver glitter made it look like pepper on mashed potatoes, or just dirt.  More debating went on in my mind as to how to salvage this project because I wasn't going to give up on the glitter floor!

DIRTY!  I didn't take a pic before it was swept up, but this is what actually stuck to the floor.

Since the glitter was already mixed, and it would be another bunch of money to go out and buy glitter again, I decided to paint the floor with grey porch paint to reduce the contrast.  I also decided that I needed the paint to be as wet as possible when applying it, so instead of tossing it like Tinkerbelle I re-used some of the glitter containers with the sprinkle top so that I could shake it onto the floor like parmesan on spaghetti.  I worked in smaller sections of 2 feet by 3 feet, shake shake shake and then paint another patch and then shake shake shake again until the whole floor was covered.  

New Plan:  Grey porch paint.
It's hard to see the sparklyness.  Grey porch paint for the win!

It wasn't the white sparkly floor that’d I’d dreamed of, but it was much better than the first try.  Regardless of the results not being as great as I would have hoped, I am still happy it’s not carpet.  What did turn out really great was the sparkle walls.  I ordered packets of a special wall glitter that you mix with water and then apply to your walls over your base paint colour.  I couldn’t get Valspar paint crystals in Canada.  When I received the packets I followed the directions and started painting the walls.  It was easy to do and I think they turned out great because it’s opalescent glitter on top of white walls.  Very subtle but very cool.  While using the packets I quickly realized that it is probably just craft store glitter with wall paper paste for the binding agent.  Probably very cheap to make, and I paid a fair amount, so kudos to them for thinking of that brilliant idea.  Maybe I’ll try making my own in another room if you can still buy wall paper paste in a powder format.

Sparkly wall in the sunlight

So after all that was said and done, I painted the puny baseboards and the trim around the door and window white and started moving in the furniture.  I got some white curtains for the window and I'm going to use a curved shower curtain rod to hide the closet area/costume dressing room space.  I still need to put up the curtains and the shower curtain rod, but the furniture is moved into the room.  I still need to do a bit more organizing of the craft supplies, but I'm writing this post from within all this sparkly goodness right now :)

This room took me a few months to do the bulk of it because of the need to re-do the floor (which threw me for a loop) and a lot of my weekends were taken up with my day job.  I’m hoping the next rooms will go quicker because I’m not doing a special treatment to the floors or the walls.

I will post an update later on with a picture of the room with it's curtains and all the craft stuff cleaned up in the storage pieces. I just felt that I needed to start updating the blog with all the things we've been doing since Christmas :)